
DIY Mother's Day Gift: A Bouquet that Will Last the Seasons!

This gift idea is based on the Graphic Enterprise Ltd magazine: 50 INSTANT GIFTS: make it today, give it tomorrow!. This 1969 magazine is packed full of DIY gift ideas for any special occasion.
To learn more about the publication and other pieces in our collection, head on over to our Facebook or Instagram page to see our Collections Highlights Series.
We have modified the materials and instructions listed on the left based on our experience making this gift, subbing materials for more accessible ones and adding instructions for more clarity. Continue reading for step - by - step instructions and photos.
Materials

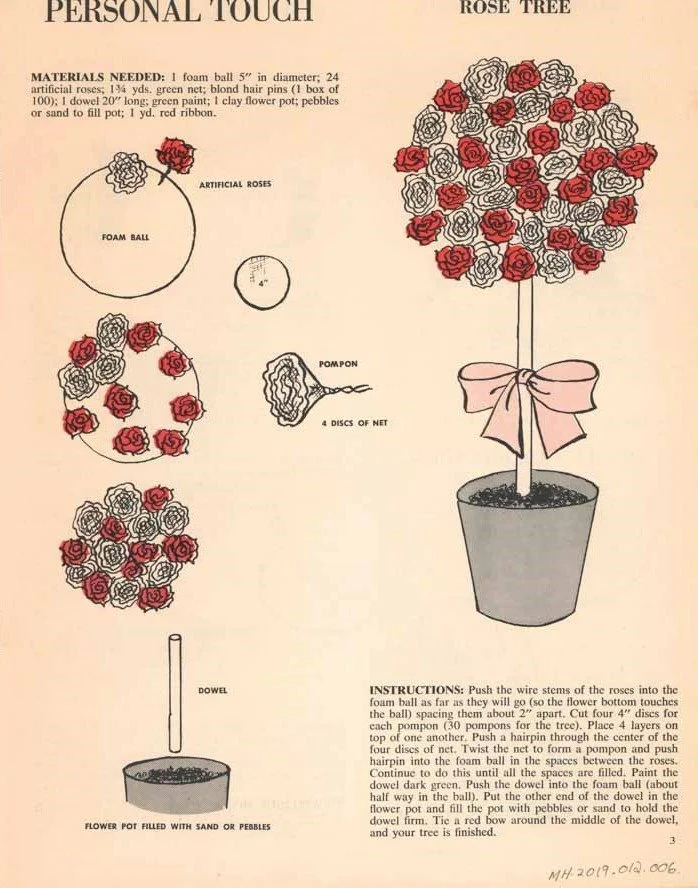
Materials Needed:
¾ yds (about 0.7m) green net or green fabric
4” discs shaped cutouts to use as a template
1 foam ball 5” in diameter
8” of red ribbon
1 clay flower pot
wire cutters
green acrylic paint
paint brush
1 dowel, 8” to 10” long
24 artificial roses
30 bobby pins, any colour
Additional Items not pictured:
sand or pebbles to fill the pot
scissors
ruler
The Roses
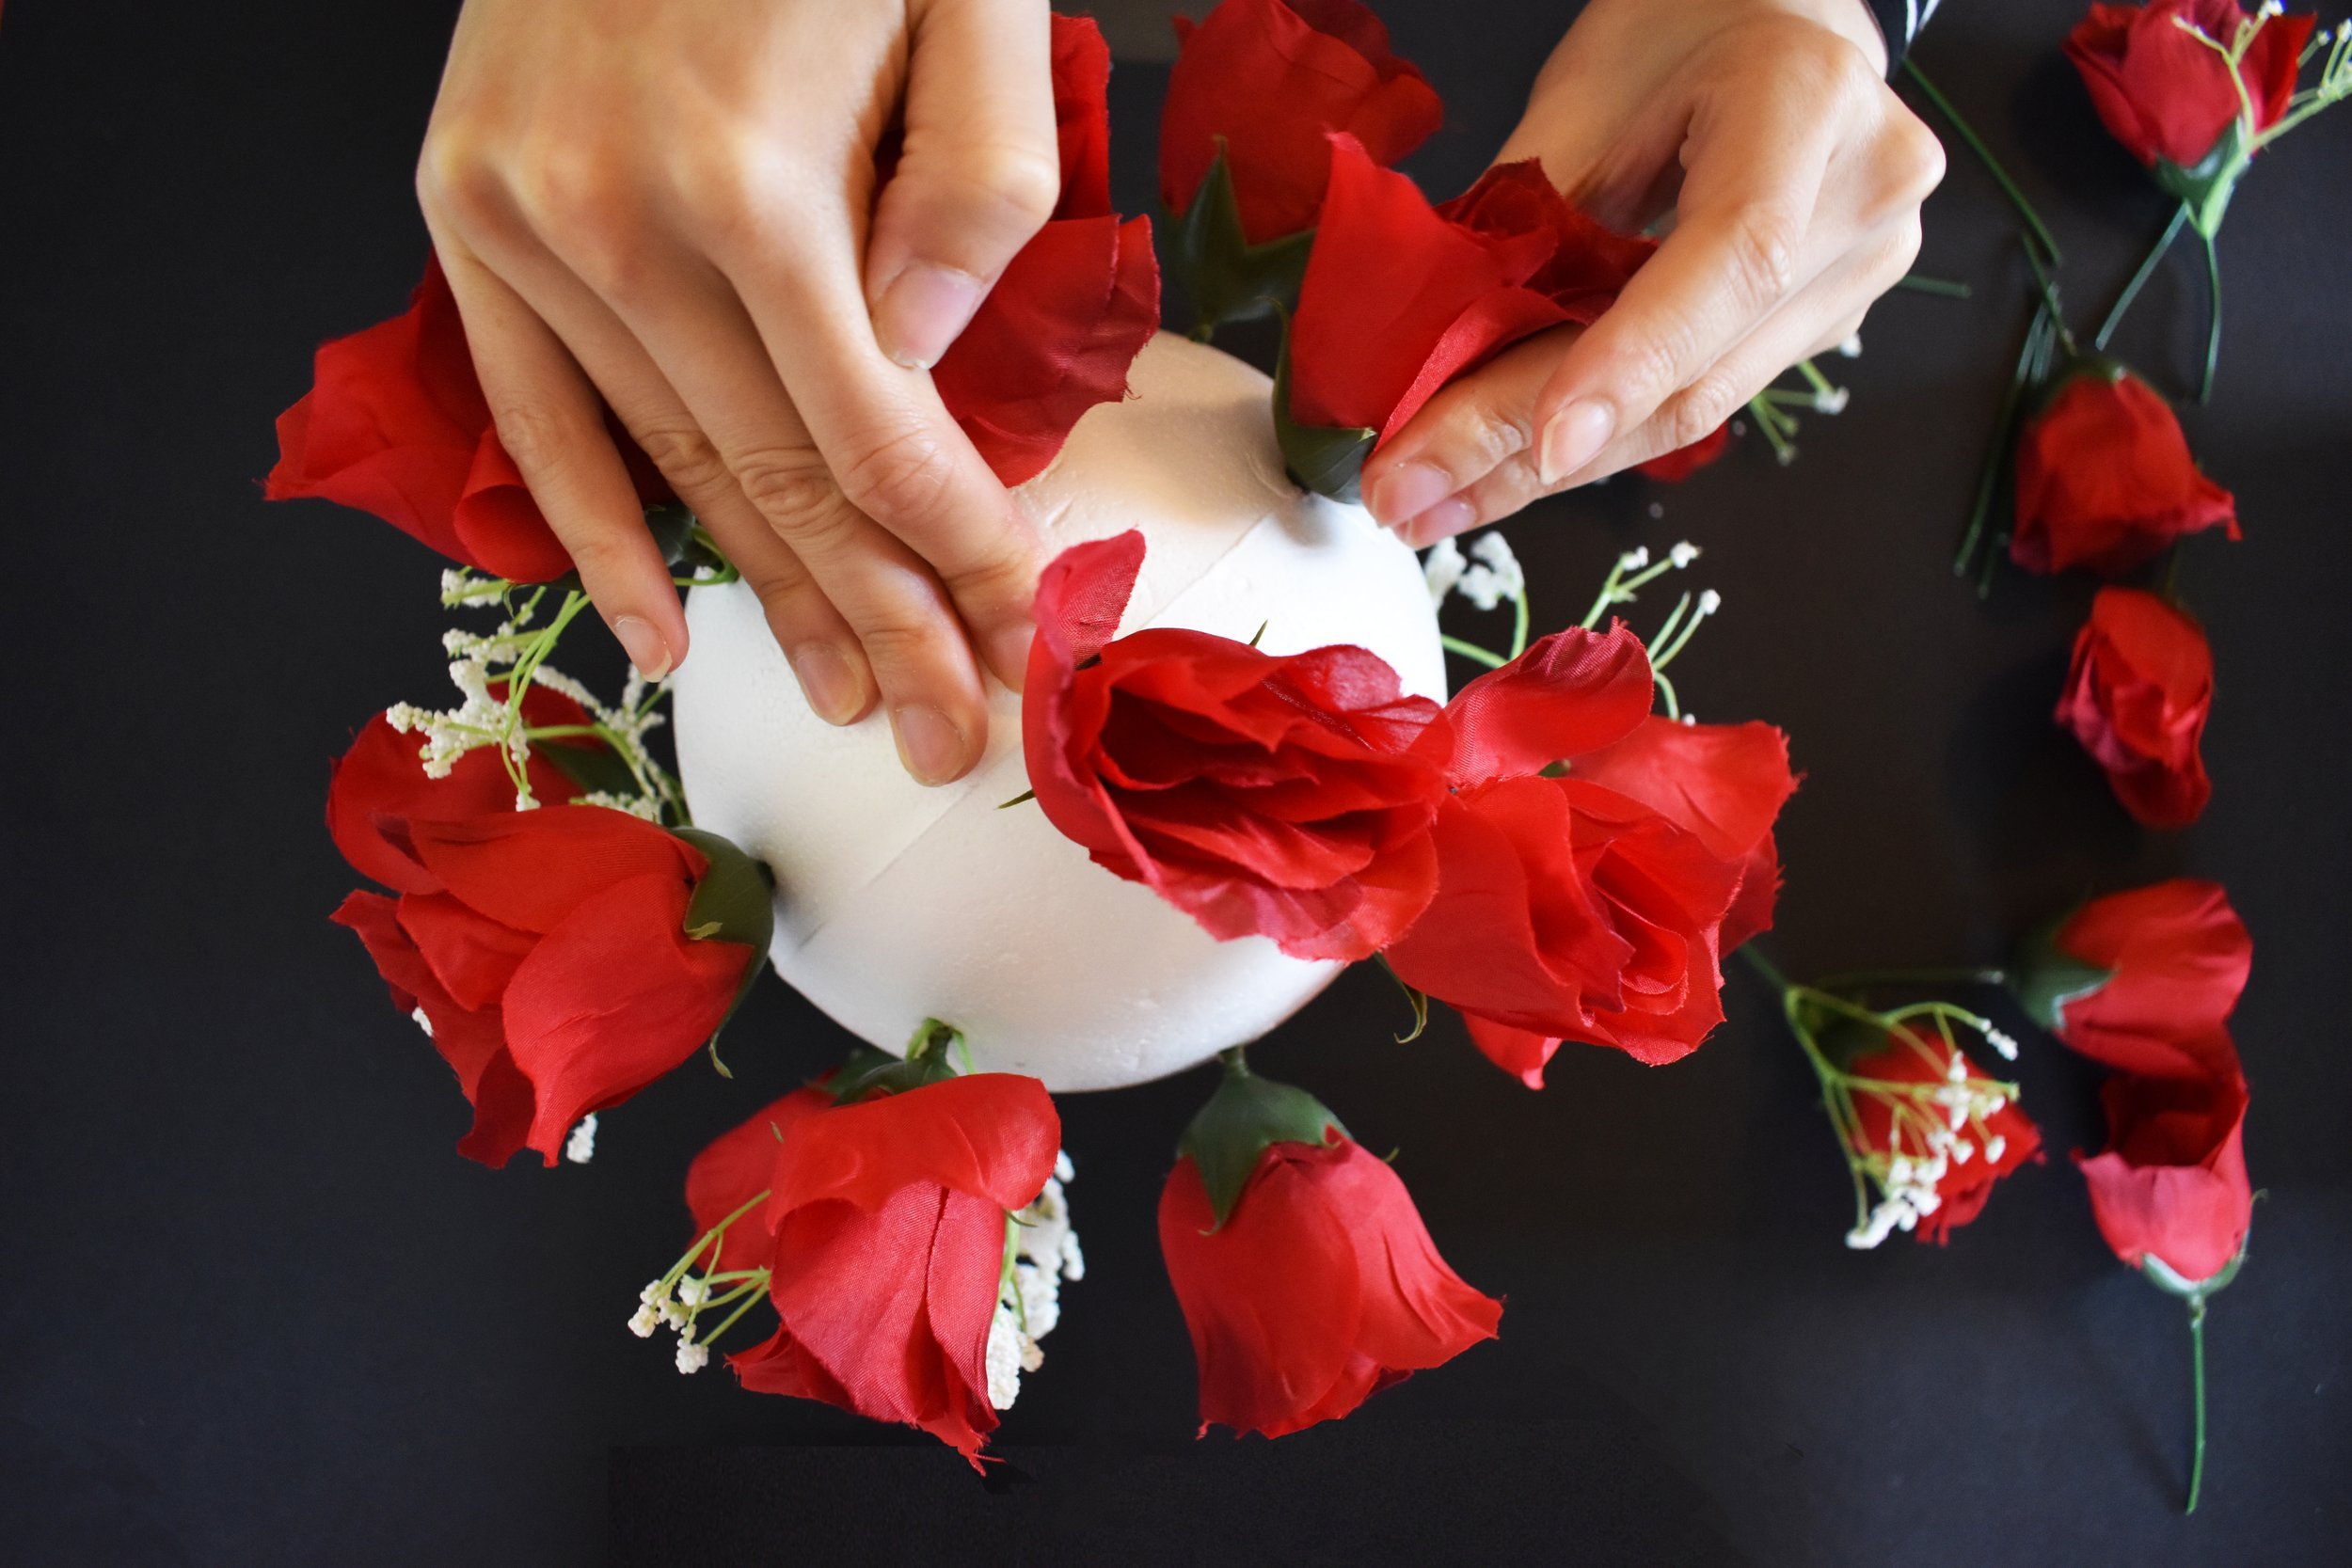
Step 1:


Trim the rose stems using a wire cutter, leaving about two inches of stem on the flower. Be sure to save the trimmed off stem, as we will be using it later in Step 8.
Step 2:


Place the foam ball on the clay flower pot for stability and then push the wire stems of the roses into the foam ball as far as they will go ( so the flower bottom touches the ball). Be sure to space the roses about 2” apart.
The Flower Pompoms
Step 3:

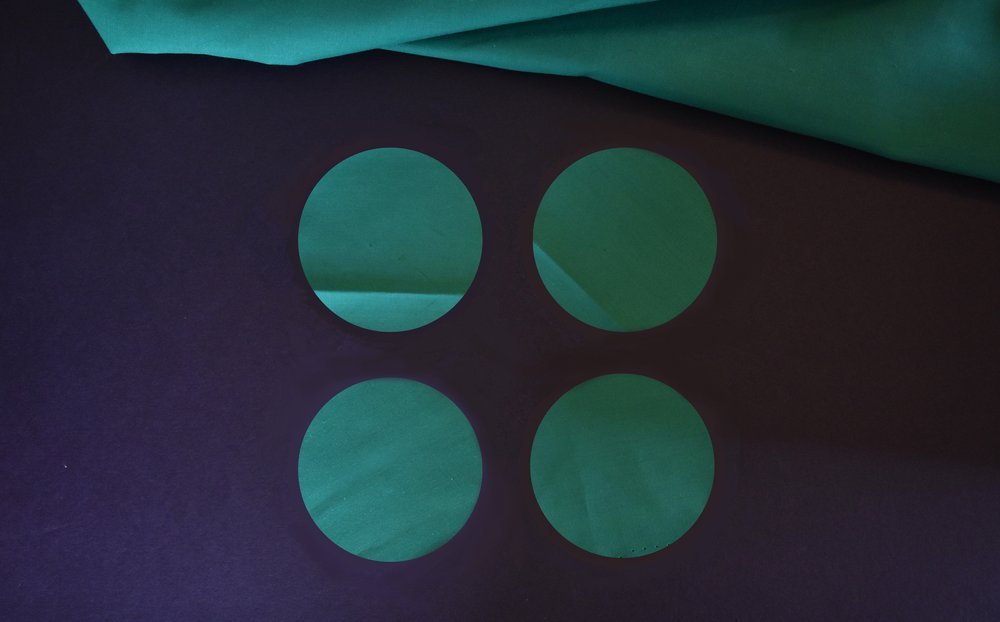
Using the 4” disc templates (we recommend making them out of cardstock), cut out 120 fabric discs. Cut them out as evenly as possible, although discs with rough edges do add to the flower pompons’ overall aesthetic. Divide them into groups of 4, we will be making 30 flower pompons (each one being made up of four discs).
Step 4:

The original instructions recommends using net instead of fabric. If using net, you can skip this step.
Using a pin or tapestry needle, make two holes at the center of each disc.
Step 5:

Insert a bobby pin through the pre-made holes as pictured.
Step 6:

Push the bobby pin through three more discs, one at a time.
Step 7:

Twist the discs around the bobby pin a couple of times to create more curves and folds.
Step 8:

Secure the discs in place using the excess wire stems that we trimmed off in Step 1. If the wire is difficult to bend, you can also use string or rubber bands. You now have one flower pompon. Repeat steps 4 to 8 to create all 30 pompons.
Step 9:

Insert the flower pompons into the form ball by pushing the bobby pins in the spaces between the roses. Continue to do this until all the spaces are filled.

The Dowel and Flower Pot
Step 10:


Paint the dowel. We used green paint, you can use any colour or leave it as is.
Step 11:

Push the dowel into the foam ball (about half way into the ball).
Step 12:

Fill half the flower pot with pebbles or sand.
Step 13:

Put the other end of the dowel in the flower pot and fill the pot with more pebbles or sand to hold the dowel firm.
Step 14:

Lastly, tie a bow around the dowel.
You now have a beautiful, hand-made mother’s day bouquet that will last the seasons!
